
Black Forest NYC Cookies

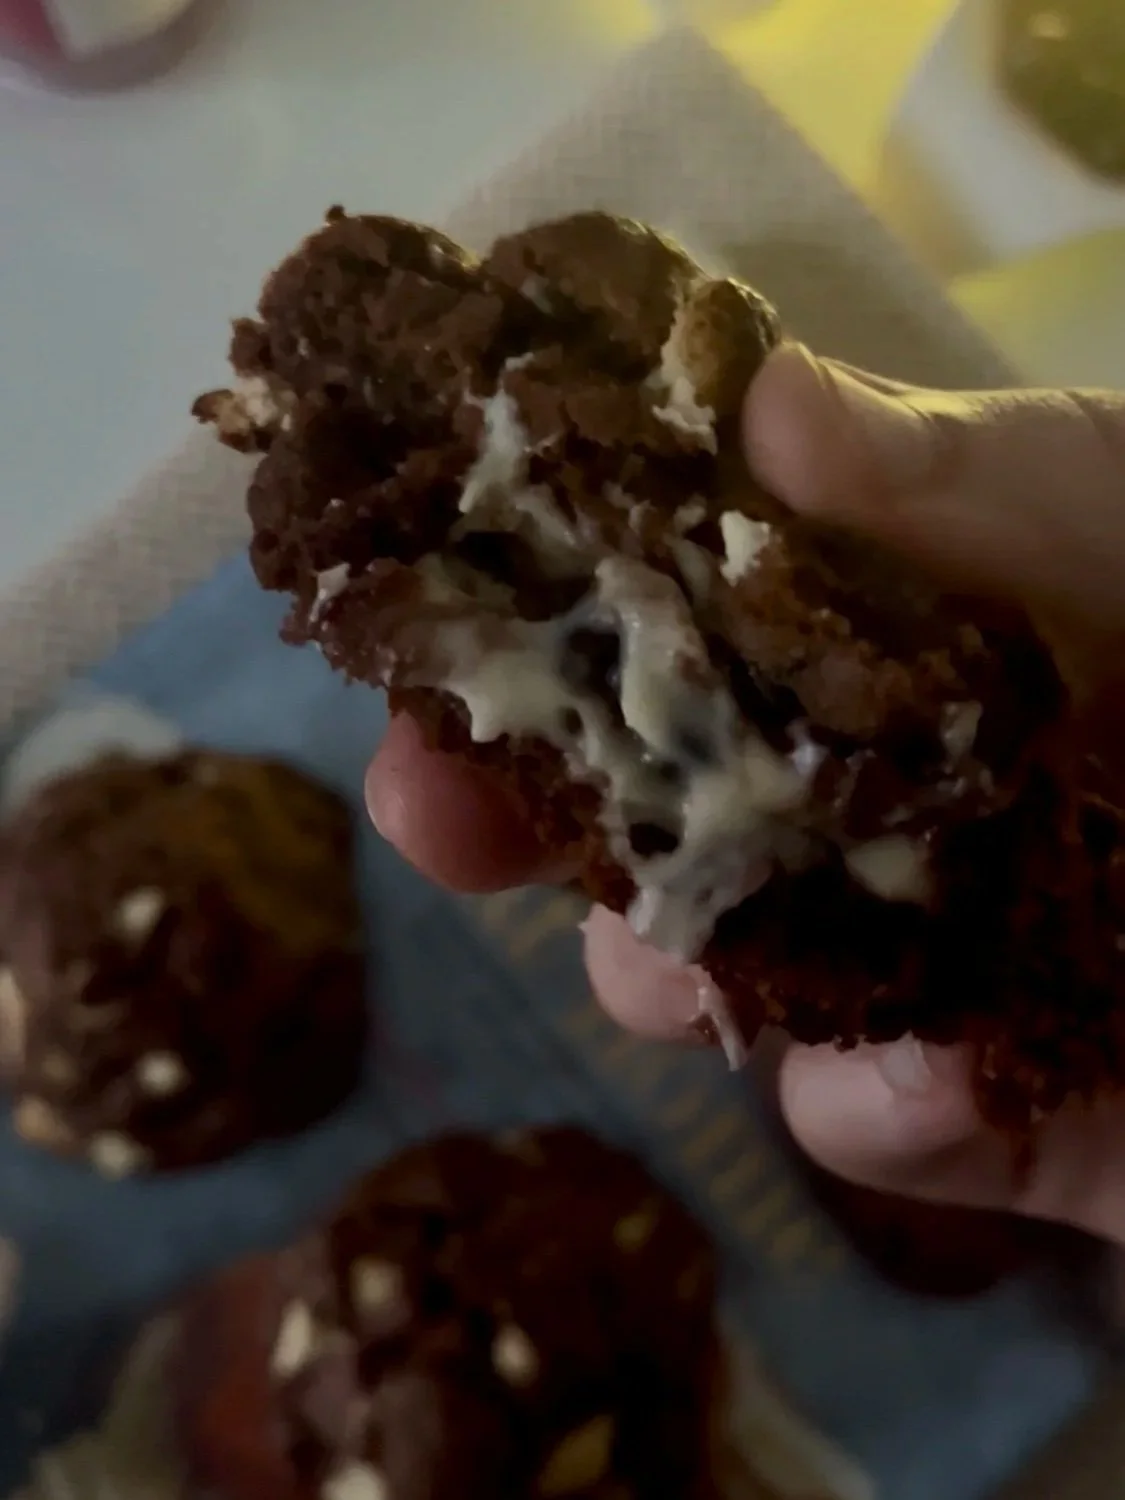
These Black Forest NYC cookies are rich, indulgent, and designed to be a little dramatic. A deeply chocolatey cookie dough surrounds a frozen cream cheese centre with a whole candied cherry inside — creating a soft, molten middle once baked.
Inspired by the classic Black Forest flavour combination, these cookies balance intense cocoa with sweetness and a subtle tang from the cream cheese filling. They’re thick, bakery-style cookies with crisp edges, a soft centre, and a surprise bite that makes them perfect for special occasions or when you want something a little extra.
If you love desserts that feel nostalgic yet elevated, these cookies are exactly that.
Why You’ll Love These Black Forest Cookies
Rich, chocolate-forward cookie dough
Creamy, tangy filling with a whole candied cherry inside
Thick NYC-style bakery cookies
Perfect for making ahead and freezing
A unique twist on a classic flavour combination
What makes these cookies truly special is the centre. Each one is filled with a frozen ball of lightly sweetened cream cheese, wrapped around a whole candied cherry.
Freezing the filling before baking is essential — it allows the cookies to bake evenly while keeping the centre soft and creamy rather than melting straight into the dough. Once baked, the filling becomes just set enough to hold its shape, creating a rich, cheesecake-like middle with a burst of cherry in every bite.
It’s a small extra step, but it’s what gives these cookies their signature Black Forest character.
Ingredients
For the Chocolate Cookie Dough
100g butter, softened
60g white sugar
70g brown sugar
55g egg (approximately 1 small egg)
5g vanilla essence
210g self-raising flour
30g cocoa powder (chocolate flavoured)
2g corn starch
200g milk chocolate chunks
For the Black Forest Filling
100g cream cheese, softened
50g icing sugar
8 candied cherries
Method
Prepare the Filling
Begin by preparing the filling, as it needs time to freeze. In a bowl, mix the softened cream cheese and icing sugar until smooth and fully combined. Take a small amount of the mixture and wrap it around one whole candied cherry, forming a neat ball. Repeat with the remaining cherries.
Place the filled cherry balls onto a tray lined with parchment paper and freeze for at least 1 hour, or until completely firm. This step is essential to ensure the filling holds its shape during baking.
Make the Cookie Dough
Preheat the oven to 200°C (no fan) and line a baking tray with parchment paper.
In a large bowl, cream together the butter, white sugar, and brown sugar for about 2 minutes, until pale and fluffy. Add the egg and vanilla essence and mix for a further minute, until fully incorporated.
In a separate bowl, combine the self-raising flour, cocoa powder, and corn starch. Add the dry ingredients to the butter mixture and mix just until a dough forms. Fold through the milk chocolate chunks.
Assemble the Cookies
This recipe makes 8 large, bakery-style cookies. For the most even results, weigh the total cookie dough and divide it evenly into 8 portions. This ensures consistent sizing and even baking.
Flatten each portion of dough slightly in the palm of your hand. Place a frozen filling ball in the centre, then carefully wrap the dough around it, ensuring the filling is completely enclosed. Gently roll into a smooth ball.
Place the cookies onto the prepared baking tray, leaving space between each one to allow for spreading.
Bake
Bake in the preheated oven for 14–15 minutes. The cookies should be set around the edges while remaining soft in the centre.
Remove from the oven and allow the cookies to rest on the tray for 5–10 minutes before transferring to a wire rack to cool. The centres will continue to set as the cookies cool, creating a soft, creamy middle.
Baking Tips
Freeze the filling fully: Make sure the cream cheese filling is completely frozen before assembling the cookies. This helps the centre stay creamy rather than melting into the dough while baking.
Weigh your dough portions: Dividing the dough evenly ensures consistent baking and uniform cookie size.
Do not overbake: The cookies should look just set around the edges but still soft in the centre when removed from the oven. They will continue to set as they cool.
Leave space on the tray: These cookies are thick but will spread slightly. Give them enough room for even baking.
Use good-quality cocoa: A richer cocoa powder will give a deeper chocolate flavour that balances beautifully with the sweet filling.
Storage
Once completely cooled, store the cookies in an airtight container at room temperature for up to 2 days.
For longer storage, keep them in an airtight container in the refrigerator for up to 4 days. Allow the cookies to come to room temperature before serving for the best texture and flavour.
Freezing
Unbaked: Assembled cookie dough balls can be frozen for up to 1 month. Bake directly from frozen, adding 1–2 minutes to the baking time.
Baked: Once baked and cooled, the cookies can be frozen for up to 1 month. Thaw at room temperature before serving.
Frequently Asked Questions
Can I make the filling ahead of time?
Yes. The filling can be prepared and frozen up to 3 days in advance, making assembly quicker when you’re ready to bake.
Can I skip freezing the filling?
Freezing is highly recommended. Without freezing, the filling may melt too quickly during baking and lose its defined centre.
Can I use fresh cherries instead of candied cherries?
Candied cherries work best for this recipe, as they hold their shape and sweetness during baking. Fresh cherries release too much moisture and may affect the texture.
Can I make smaller cookies?
Yes, but keep in mind the filling-to-dough ratio will change. Reduce baking time slightly and ensure the filling is still fully enclosed.
Why are my cookies soft in the centre after baking?
That’s intentional. These cookies set as they cool, creating a soft, bakery-style centre with a creamy middle.